Want to add some fun to your sock drawer? Tie dying is an easy craft project that lets you create colorful socks. This article will provide a step-by-step guide for you to learn how to tie dye socks.
Gathering Your Tie Dye Supplies
You’ll need specific supplies to create beautiful tie-dye socks that will last through many washes. Getting the right materials will make your project much easier and more fun.
Choosing the Right Socks
Using cotton socks is the best. Pick plain white socks that are at least 50% cotton – the higher the cotton content, the better the dye will absorb.
Crew socks or your old ankle socks both work great. Make sure to get clean ones.
Avoid socks with polyester or nylon as main materials. These synthetic materials won’t hold dye well.
Selecting Tie-Dye Colors
Selecting colors for your tie-dye project, you’d better pick fiber reactive dyes for the brightest, longest-lasting results. These special dyes create a permanent bond with natural fibers.
Popular color combinations include:
- Rainbow: Red, orange, yellow, green, blue, purple
- Ocean: Blues and greens
- Sunset: Pink, orange, yellow
- Galaxy: Purple, blue, pink
Or you can explore color combinations by yourself. 2-3 colors are better for each pair of socks.
Assembling Additional Materials
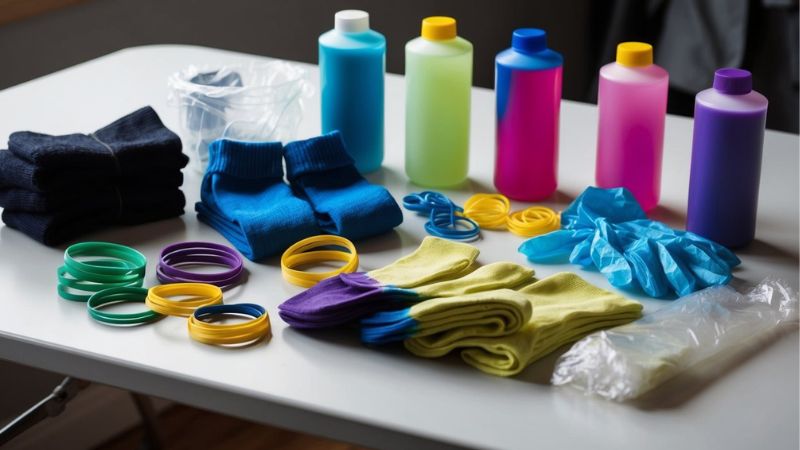
Essential items:
- Rubber gloves
- Rubber bands
- Plastic table cover
- Paper towels
- Soda ash (dye fixer)
- Squeeze bottles
- Small plastic bins
- Old towels
- Spray bottle
Preparing Your Socks
Getting your socks ready for tie-dyeing involves a few essential steps to ensure the best possible results. Clean socks and a well-organized workspace will help you create amazing tie-dye patterns.
Pre-Washing
Washing tie-dye socks in hot water with regular detergent to remove any dirt or oils. Don’t use fabric softener – it can prevent the dye from properly bonding with the fabric.
Keeping the socks damp after washing makes them easier to work with. If they’ve dried, soak them in warm water for a few minutes before starting the tie-dye process.
Setting Up the Work Area
Pick a space that’s easy to clean and close to a water source. Your garage, bathroom, or outdoor area are good options.
Cover your work surface completely with plastic sheets or newspapers. The dye can stain, so protect any nearby furniture or floors.
Keep paper towels within reach for quick cleanup of spills. Put on old clothes or an apron to protect your clothing from dye stains.
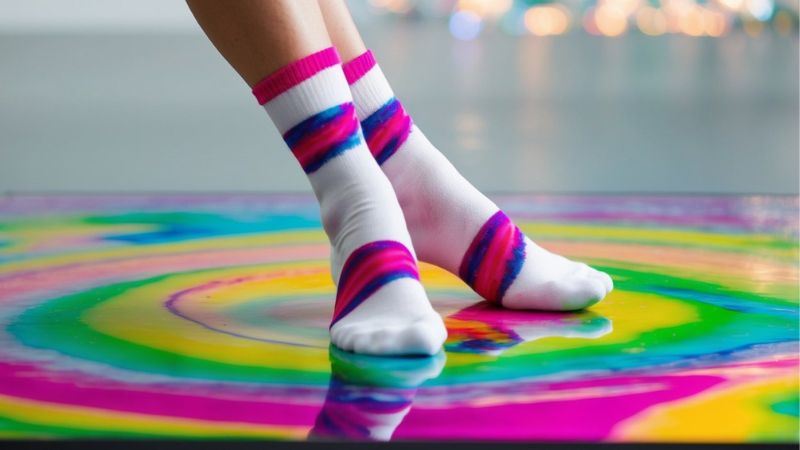
Tie-Dye Techniques
Creating beautiful tie dye patterns on socks starts with mastering some simple folding and binding methods. These techniques will help you make eye-catching designs that look professional.
Basic Folding Methods
The tie-dye patterns mainly depend on how the socks are folded.
- Spiral: Pinch the middle of the sock and twist it until it forms a flat circular shape. This creates a fun swirl effect when dyed.
- Stripes: Fold the sock lengthwise into a long rectangle. This technique works great for beginners and gives you clean, defined lines.
- Crumple: Scrunch your sock randomly on your work surface. Use gentle pressure to crumple the fabric into a loose ball shape. Avoid pressing too hard or making the bundle too tight.
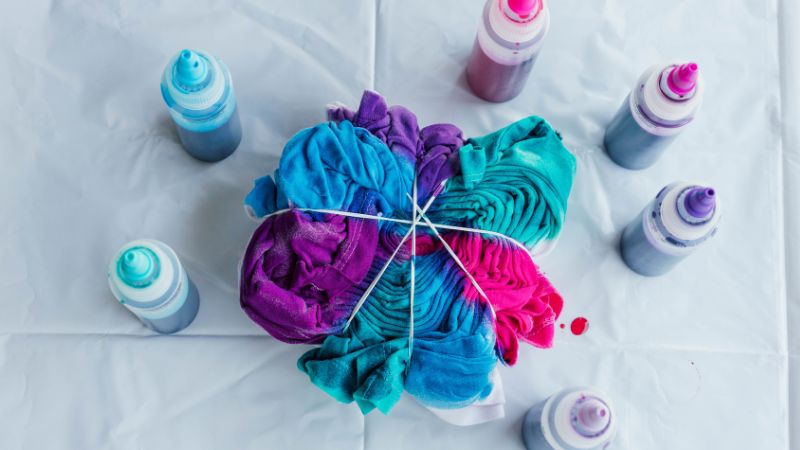
Applying Rubber Bands
Rubber bands are essential for keeping your folds in place and creating distinct patterns. Place them about 1-2 inches apart for clear separation between colors.
For spiral designs, use 4-6 rubber bands arranged like pizza slices from the center outward. This helps maintain the circular shape during dyeing.
When making stripes, wrap rubber bands tightly around your folded sock at regular intervals. Make sure the bands are secure but not so tight that they damage the fabric.
Mixing the Dye
Getting your dye solutions ready is one of the most important steps for creating vibrant tie-dyed socks. Taking time to mix everything properly will give you the best results.
Creating Color Solutions
Mix 3 teaspoons of dye powder with 1 cup of warm water for each color you want to use. Stir until the powder completely dissolves.
Use a funnel to pour your mixed dye into squeeze bottles. This makes it much easier to apply the dye to specific areas of your socks.
If your dye kit came with soda ash, prepare that solution too. Add 1 cup of soda ash to 1 gallon of warm water and mix well.
Applying the Dye
Now comes the fun part of bringing your sock designs to life with vibrant colors. The key is to create clear patterns and apply the dye carefully to get the best results.
The Dying Process
Make sure to wear gloves to protect your hands from stains. Lay down newspaper or plastic to protect your work surface.
Place your tied socks in a plastic bag while working to prevent mess. Squeeze the dye bottles directly onto the fabric, working one color at a time.
Start with lighter colors first, then add darker shades. Make sure to saturate the fabric completely.
For multicolor designs, keep different colors from bleeding together by leaving small undyed spaces between them.
Let the dye set for at least 8 hours in a warm place. Keep the socks wrapped in plastic to stay damp during this time.
Setting the Dye
After applying your dye patterns, proper setting techniques will make your tie-dye socks bright and long-lasting. The right wrapping method and waiting time are key to getting vibrant results.
Wrapping the Socks
Place your dyed socks in plastic bags to keep them damp while the dye sets. Make sure to squeeze out any excess air from the bags to prevent the socks from drying out too quickly.
Wrap each sock separately to avoid the colors bleeding into each other. If you’re dyeing multiple pairs, you can put each pair in its own bag.
For extra protection, you can double-bag the socks or wrap them in plastic wrap. This keeps the dye warm and moist, which helps it bond better with the fabric.
Waiting Period Details
Your socks need at 8 hours to set properly, but letting them sit for at least 24 hours will give you the boldest colors. Keep them in a warm spot during this time – warmth helps the dye bond with the fibers.
Don’t unwrap your socks early, even if you’re excited to see the results! The longer you wait, the better the colors will turn out.
Store your wrapped socks somewhere they won’t be disturbed. A laundry room or garage works well, just make sure the temperature stays above 70°F (21°C).
Rinsing and Washing the Socks
The right cleaning steps will keep your tie-dyed socks bright and beautiful. Follow these proven methods to lock in those vibrant colors and make your socks last.
Rinsing
Rinse your socks under running water until the water runs clear. Remove all rubber bands and other binding materials first.
For the best results, rinse your tie-dye socks separately to prevent colors from bleeding onto each other. Hold the sock under running water and gently squeeze to help release excess dye.
If you see the water getting clearer, you’re on the right track! Keep rinsing until no more dye comes out.
Washing
The first wash is super important for setting the dye properly. Wash your socks alone or with other tie-dyed items only.
Use these steps for the first wash:
- Use cold water only
- Select a gentle cycle
- Add mild detergent
- Avoid fabric softener
- Dry on low heat
Let the socks dry completely before wearing them. This helps the colors stay bright and true.
Long-Term Care Tips
Always wash your tie-dyed socks in cold water with similar colors. Turn them inside out before washing to protect the design.
Colors can bleed in water, so avoid leaving wet socks in contact with other clothes.
Quick Care Tips:
- Skip the bleach
- Avoid hot water
- Don’t iron directly on the design
- Store away from direct sunlight
Hang your socks to dry when possible. This gentle drying method helps preserve the colors longer.
Conclusion
Making your own tie-dye socks is a fun and easy way to add color to your wardrobe. You can create endless patterns and color combinations to match your style.